 Freshly made gaskets before reassembling the instrument cluster. While the instrument cluster is off the bike – we're waiting for a shipment of fork oil before putting the front end back together – it made sense to cut some new gaskets to replace the brittle 47 year old ones. For the gaskets under the speedo and tach bodies, we sourced a 3/32" fabric reinforced neoprene rubber which matched closest to the original gasket material. Templates were made in Adobe Illustrator with center points for the arcs, and the new gaskets were carefully cut with an X-Acto knife and a circle cutter. 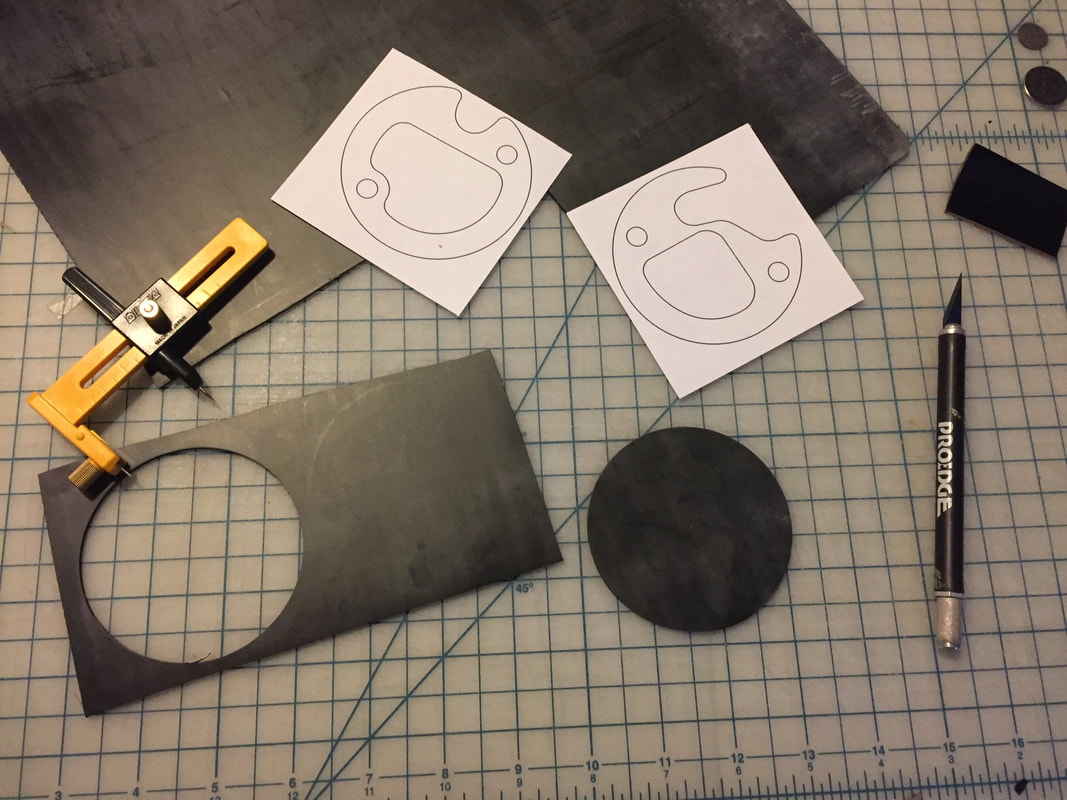 Templates 1.0. Version 2.0 with arc centerpoints worked better. The original tiny, thin gasket underneath the knurled trip meter was made from a paper thin rubber that had folded on itself. For this gasket, we chose a 1/64" water-resistant lightweight fiber gasket material made from a blend of paper fiber and SBR rubber. 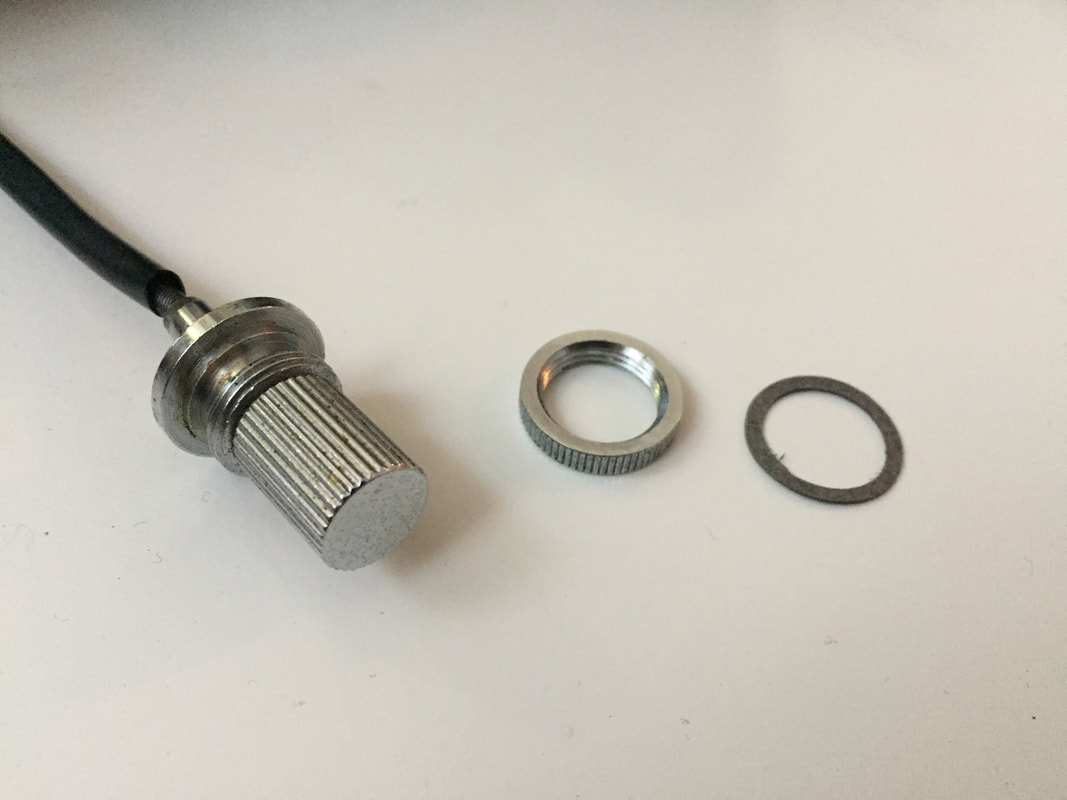 5/64" gasket cut easily with the paper and rubber gasket material. The newly done instrument cluster is ready to go back on the bike! 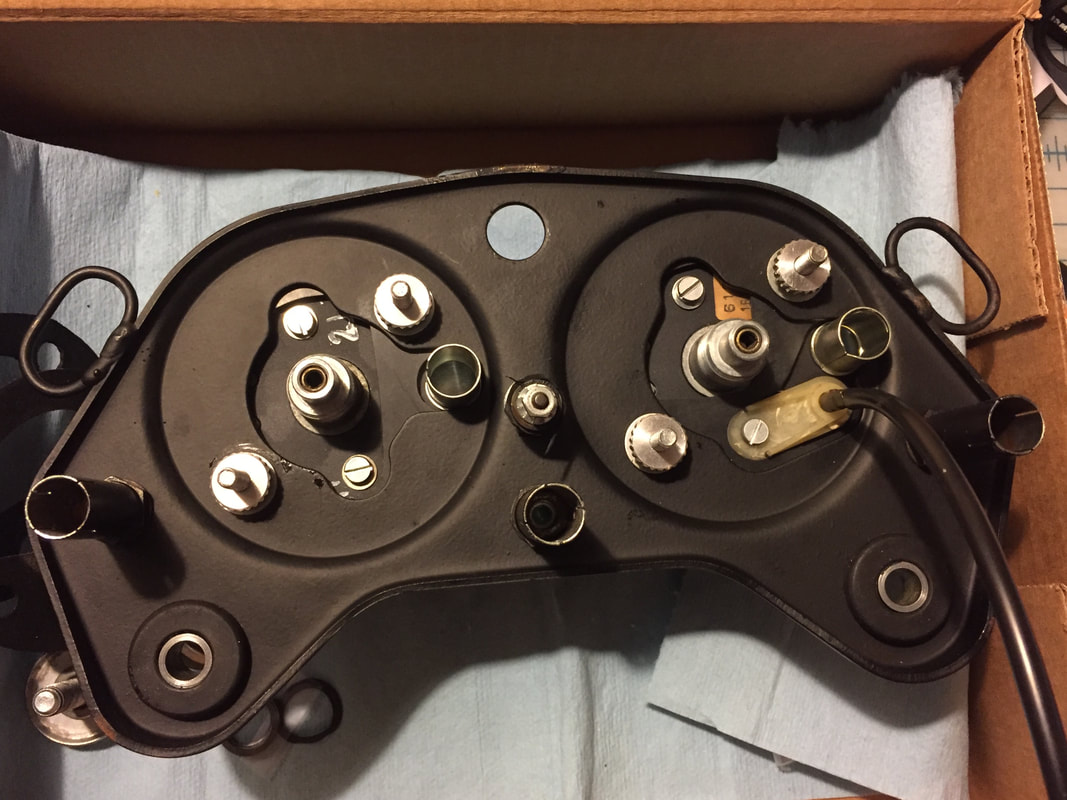
0 Comments
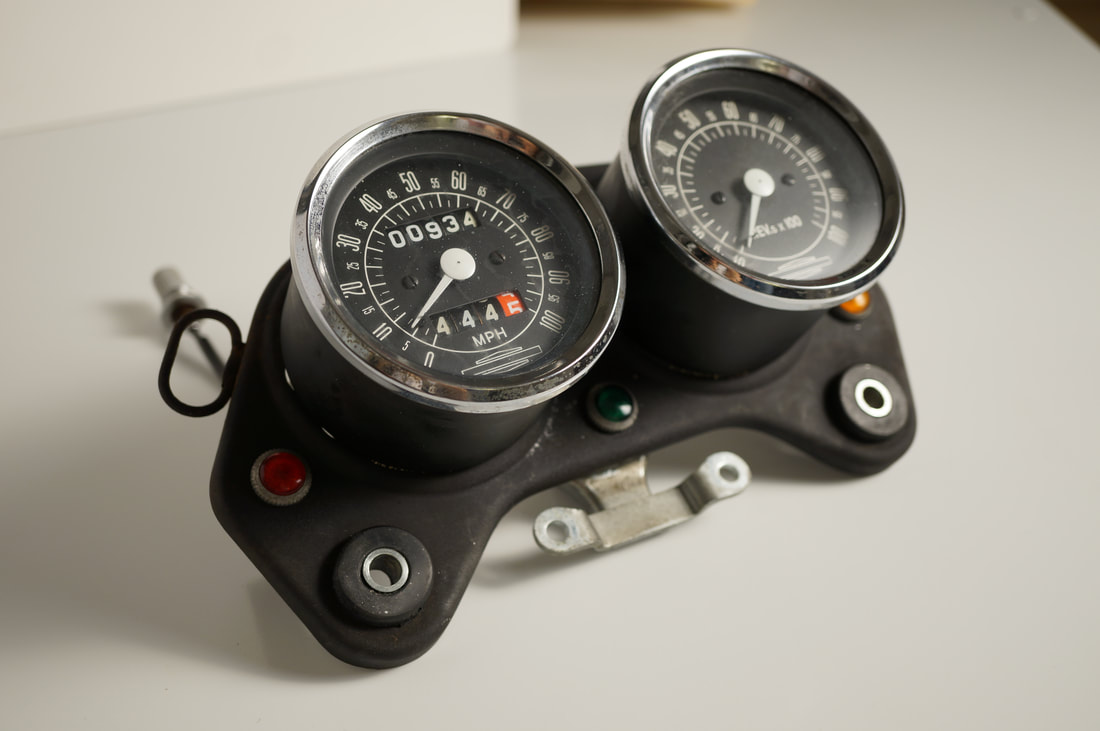
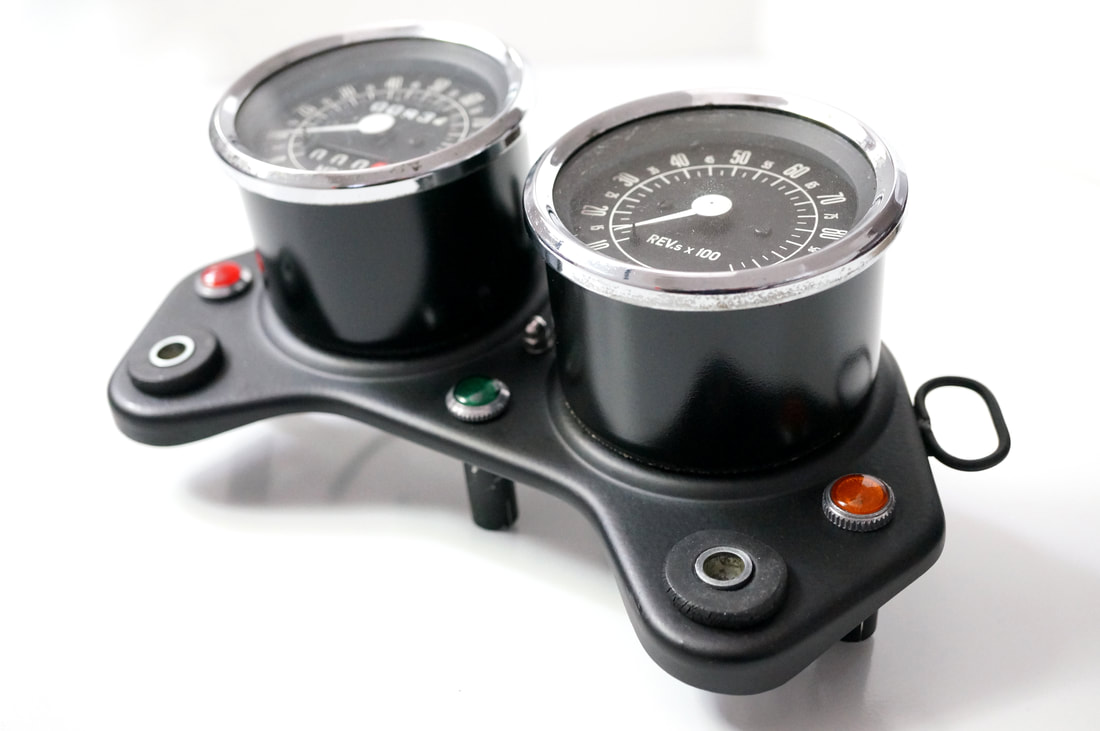 The rebuilt instrument cluster with its new bracket, polished hardware, and painted gauges.
There was nothing wrong with the old bracket, per se, in fact we could have just spray painted the old one, but who could resist a $7 steal on Ebay for a NOS part. Part of the satisfaction comes from scavenging old parts online!
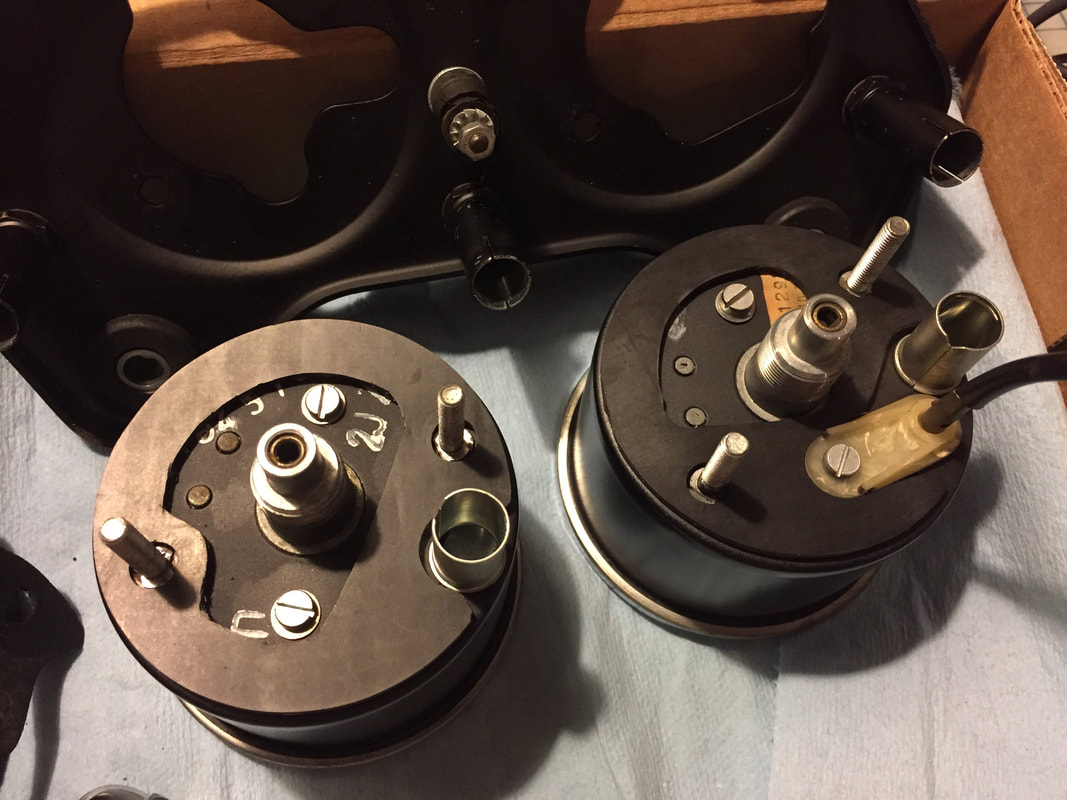
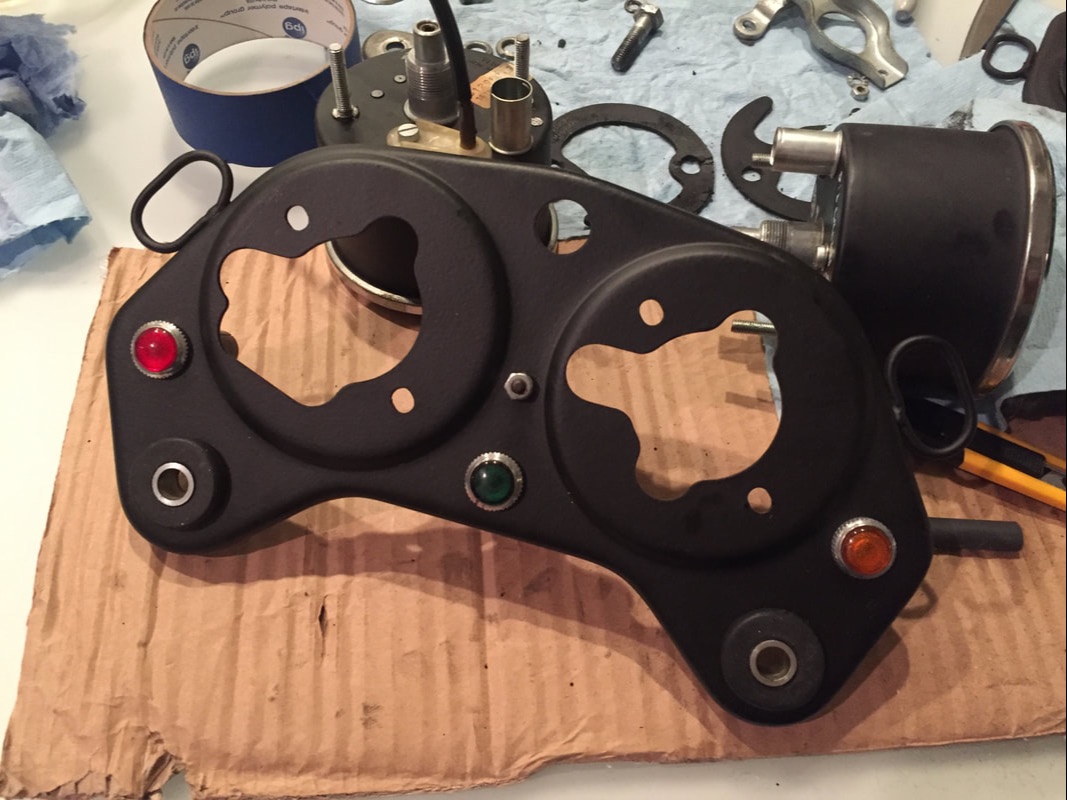 After removing all the original fittings from the bracket, we went to town, polishing the knurled chrome rings framing the colored lenses, the dial on the trip meter, and all the visible mounting hardware. The 47 year old rubber gaskets need to be replaced at a later date since they're losing their pliability, but we're anxious to put this component back on the bike. 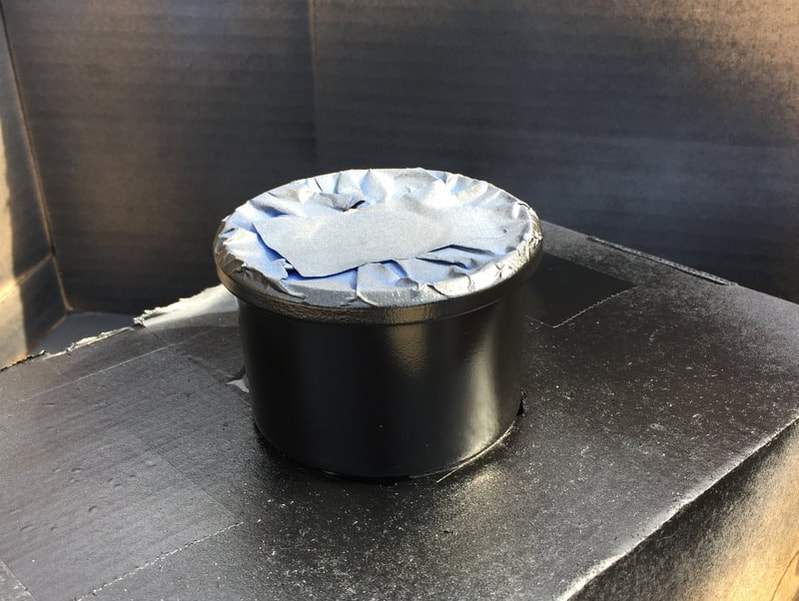 Spray painting… it's all in the set-up! The following day, we sanded the gauge bodies and readied them for painting. (Good weather and low winds were on our side in NYC that day!) We chose to use Rust-oleum® Black Semi-Gloss Protective Enamel, after a good prime coat. Overall, the new bracket with its polished fittings looks great. While it's off the bike, we can drool at it while admiring our handiwork and its fine Italian aesthetics. But before it gets installed again, we change the fork oil… 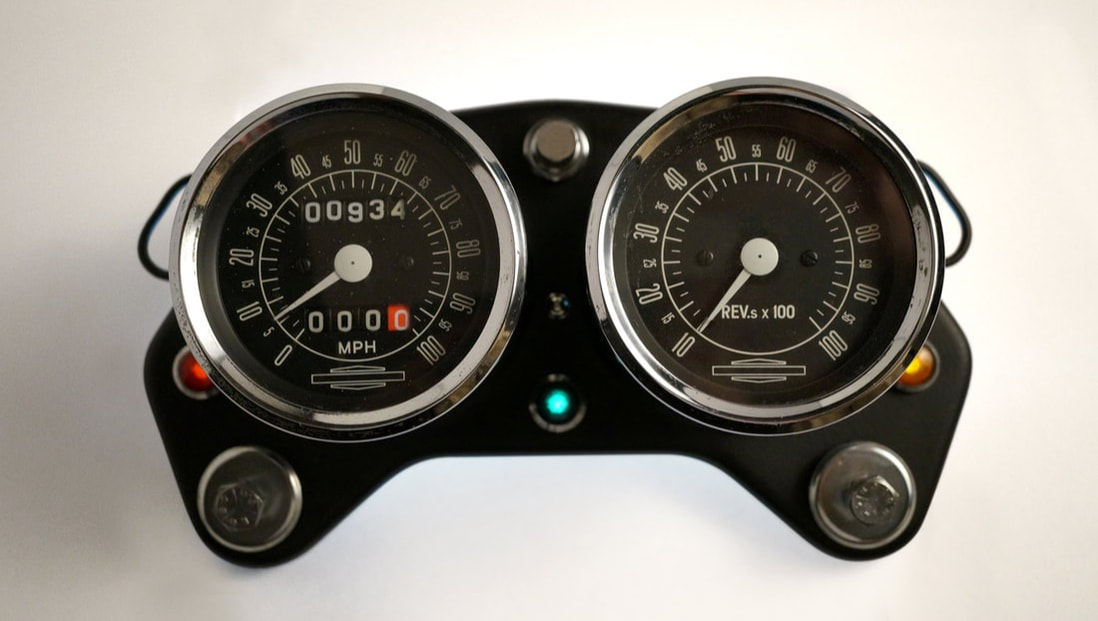 Lenses have been backlit for the full on-bike effect. 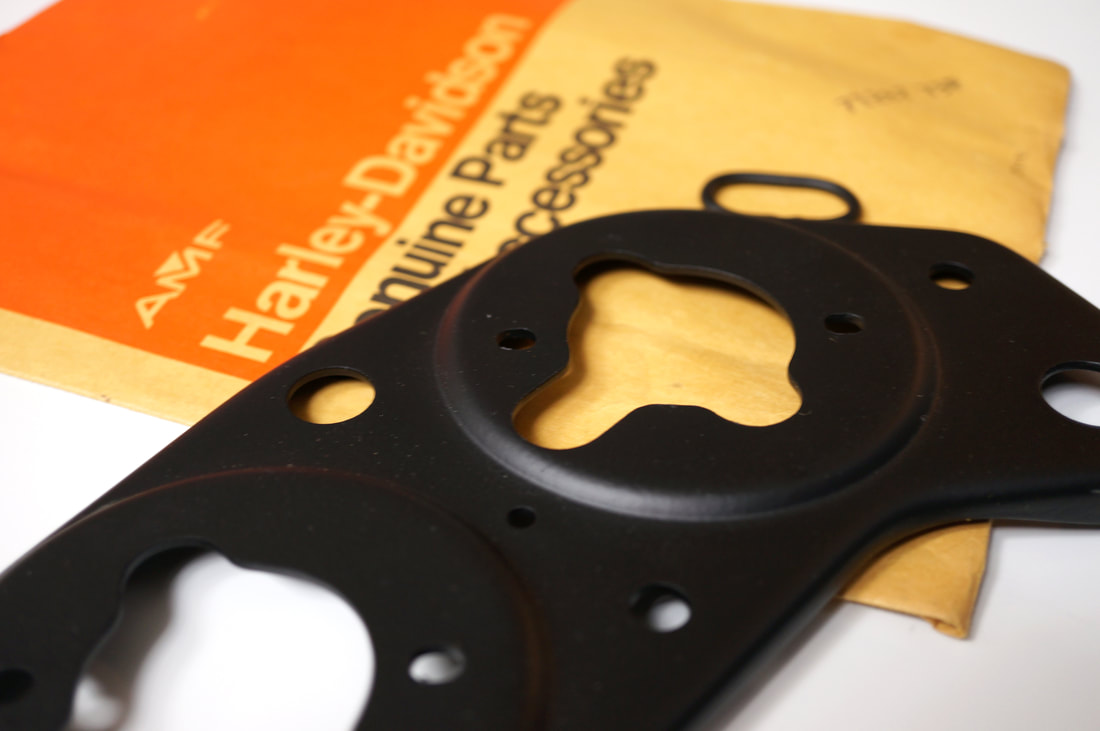 We got this new old stock instrument bracket in the mail today, wrapped in its super cool Harley Davidson 70s packaging. The NOS bracket has a little ding on the front (maybe it was a factory "irregular") but otherwise looks great with it's original paint finish. Our current bracket is rusted and the oval tabs look like they might break off with the force of a pinky.  Trying to remove the instruments proved to be a learning experience in patience. Unlike the near-to-instant gratification of polishing the rust off the chrome, getting into actual bike components is a slow, careful navigation of unfamiliar engineering. Add to this, trying to gingerly remove the nearly 50 year old parts so we don't damage them in the process. This includes old rubber gaskets, trying to not break aluminum bolts, and trying to not crack any difficult to find plastic parts. Removal required:
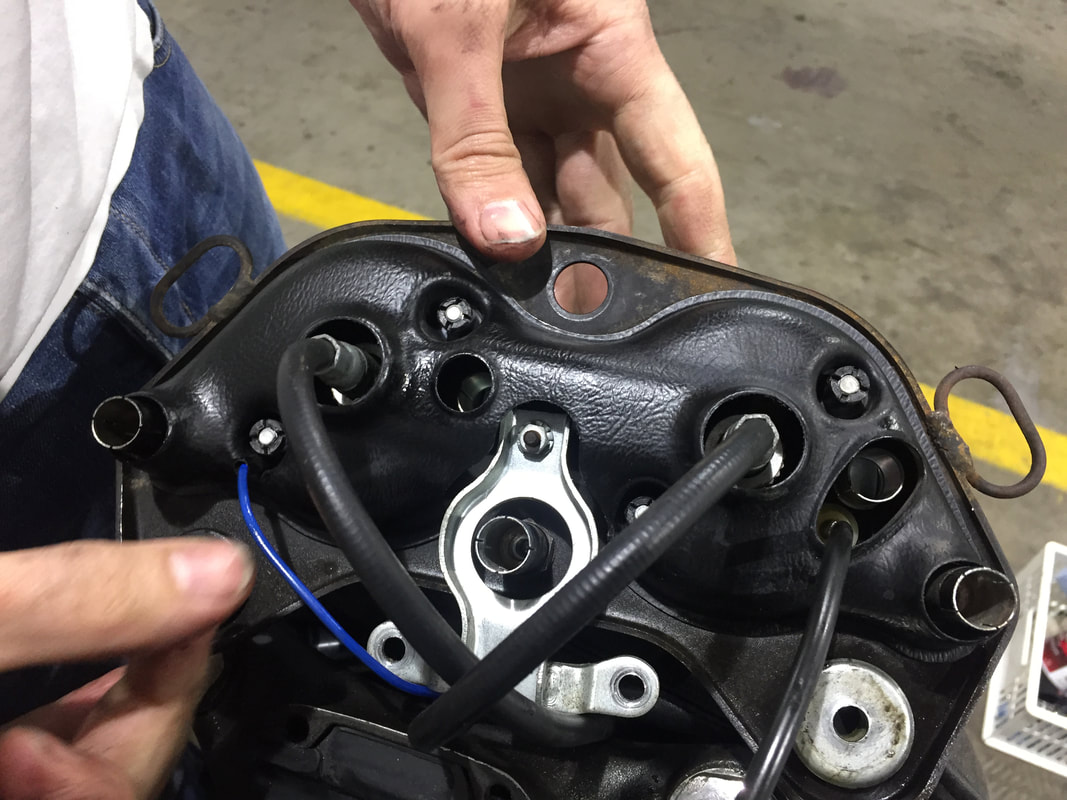 Here, we ran into a roadblock. The four screws attaching the molded plastic shell forming the underside of the instrument cluster seemed permanently attached. Were they press fitted on to the posts? Did we need to unscrew the strange plastic sleeves which we'd never seen before? [NB. The service manual is barely helpful and we were trying to be delicate with all the parts instead of ripping them off with brute force.]  The bracket that we thought we'd install in half an hour…LOL. |
ArchivesCategories |

 RSS Feed